
Set dedicated TLS certificate for Nessus server
09 Feb 2016 || certificate • letsencrypt • nessus
The installation of LetsEncrypt tool is incredibly fast with git ! The certificate generation is really simple and the deployment in nessus application is straightforward. Notes inspired by this post.
Environment
- OVH Virtual Private Server (VPS) with Debian 7.x (x64) OS
- Nessus Home (v6.5.5) : download the “Nessus Home” version for Debian 6 and 7 / Kali Linux 1 AMD64
- letsencrypt.org : a free certificate provider without registration
Get LetsEncrypt tool
On the OVH server, clone the letsencrypt repository in your home directory:
cd ~
git clone https://github.com/letsencrypt/letsencrypt
Generate the certificate
Stop the nessus deamon :
/etc/init.d/nessusd stop
Generate a new certificate with LetsEncrypt assistant:
cd ~/letsencrypt
./letsencrypt-auto --agree-dev-preview --server https://acme-v01.api.letsencrypt.org/directory auth
Deploy the certificate
Copy the following files with root priviledges using sudo :
sudo cp -i /etc/letsencrypt/live/scan.bbouille.eu/fullchain.pem /opt/nessus/com/nessus/CA/servercert.pem
sudo cp -i /etc/letsencrypt/live/scan.bbouille.eu/privkey.pem /opt/nessus/var/nessus/CA/serverkey.pem
sudo cp -i /etc/letsencrypt/live/scan.bbouille.eu/chain.pem /opt/nessus/com/nessus/CA/cacert.pem
Then restart the nessus daemon :
/etc/init.d/nessusd start
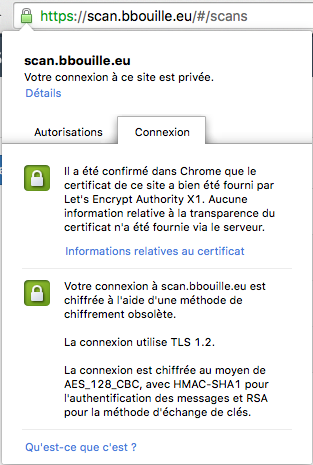
Result
Connect to the nessus web application and check the certificate :
Limitation
Please note that your certificate has a short life span : Let’s Encrypt CA issues short-lived certificates (90 days). See the documentation to renew the certificate : https://letsencrypt.readthedocs.org/en/latest/using.html#renewal